

Realtime Views Counter has been added in Plus UI 2.6.1 & Plus UI 2.6.2, which shows the Realtime views of your Blog Posts with the help of Firebase Database.

To enable it on your Blog, follow these simple steps:
Step 1: create a project in Firebase

Type your project name
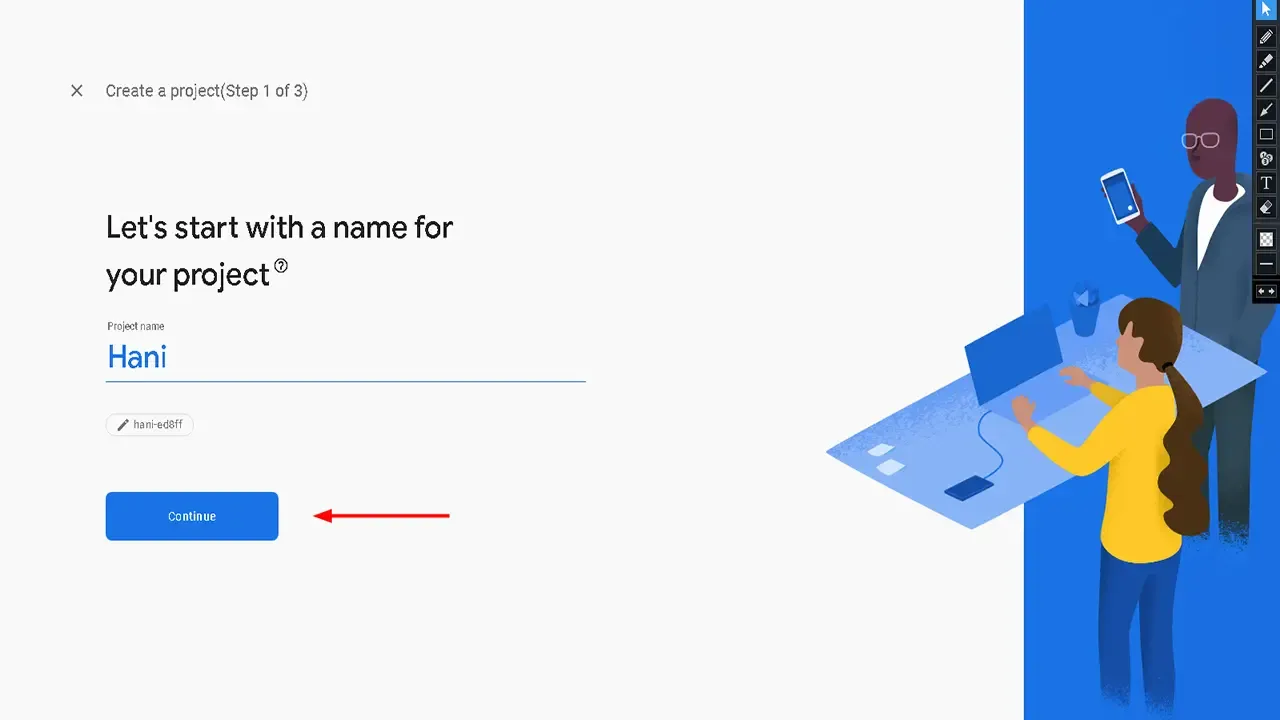
Click on Continue

Select Default account for firebase and click on Create project

Step 2: Create Database for your Project.
Click on Build section then open Realtime database

Click on Create Database

Click on Next

Click on Enable

Step 3: Open rules section and paste the following code

For Single Blog:
{
  "rules": {
    ".read": true,
    "BlogID_0000000000000000000": {
      ".read": true,
      "$post_id": {
        ".write": "newData.exists() && (data.exists() ? newData.val() == data.val() + 1 : newData.val() == 1)",
        ".validate": "newData.isNumber() && newData.val() % 1 === 0.0 && newData.val() <= 99999999"
      }
    }
  }
}
If you want to add more than one blog to your database, use the following rules:
For Multiple Blogs:
{
  "rules": {
    ".read": true,
    "BlogID_0000000000000000000": {
      ".read": true,
      "$post_id": {
        ".write": "newData.exists() && (data.exists() ? newData.val() == data.val() + 1 : newData.val() == 1)",
        ".validate": "newData.isNumber() && newData.val() % 1 === 0.0 && newData.val() <= 99999999"
      }
    },
    "BlogID_0000000000000000000": {
      ".read": true,
      "$post_id": {
        ".write": "newData.exists() && (data.exists() ? newData.val() == data.val() + 1 : newData.val() == 1)",
        ".validate": "newData.isNumber() && newData.val() % 1 === 0.0 && newData.val() <= 99999999"
      }
    }
  }
}
Step 4: get your Blog ID
Go to posts then you will find your blog id in the top

Copy your blog id and replace it in the database rules then click on publish

Step 5: Now copy the Database URL.

Step 6: Go to Theme then Edit HTML.

Step 7: Find the following codes:
realViews: {
  databaseUrl: "",
  abbreviation: "false"
}
Paste your Database URL, it will look something like following

Step 8: Save Changes and refresh your Blog Page.
Now you can enjoy with the Realtime post view and all the features.
Tutorial video
- How to install a blogger template
- Blogger cleaning template 2022
- Plus ui 2.6.1 premium blogger template Free download
- Plus ui 2.6.2 premium blogger template Free download
- Plus ui 2.6.2 about us page
- Plus ui 2.6.2 contact us page
- Plus ui 2.6.2 sitemap page
- Plus ui 2.6.2 sifelink page
- Plus ui 2.6.2 landing page
Copyright: @hani2up
